In this article you will learn how to troubleshoot license activation.
License activation
You can activate your license on the Trial Version form or in the Account section. You must be online to activate the software and access to the ideamerit.com domain must not be restricted in any way.
Connection timeout (Error 786)
If you get the following error:
Error 786: Connection timeout. Access to www.ideamerit.com from the application might be restricted (VPN/Firewall)
Please do the following steps.
1. Make sure you are online Use a very simple test to see if you can visit our website https://www.ideamerit.com in your browser and if you can see a list of examples.
2. Try to change the network If possible, try to change the network. For example from WI-FI to LAN or you can try a mobile connection. The connection timeout limit is set to 15 seconds. If you have a slower connection, the request may not be processed in time.
3. Make sure the application has an unrestricted access to the ideamerit.com domain If you use a firewall, antivirus software, etc., make sure your settings do not block access from the application to the ideamerit.com URL and that the access is not blocked by your ISP.
4. Setup proxy – if needed If you need to set up a proxy, go to Settings and click Configure Proxy. Specify values valid for the proxy you need to use.
5. Contact us for more information If you still cannot successfully activate the software, please send us email to support@ideamerit.com. We will send you further information on how to set up the proxy, or send you a step by step instructions on how to obtain and save the license file for your purchased license. We will handle your request with higher priority, however, we ask for your patience as we provide support during working hours.
Ideamerit Designer is customizable! You can easily add your own custom properties, display them directly on the diagram and use them to generate your own scripts or other outputs.
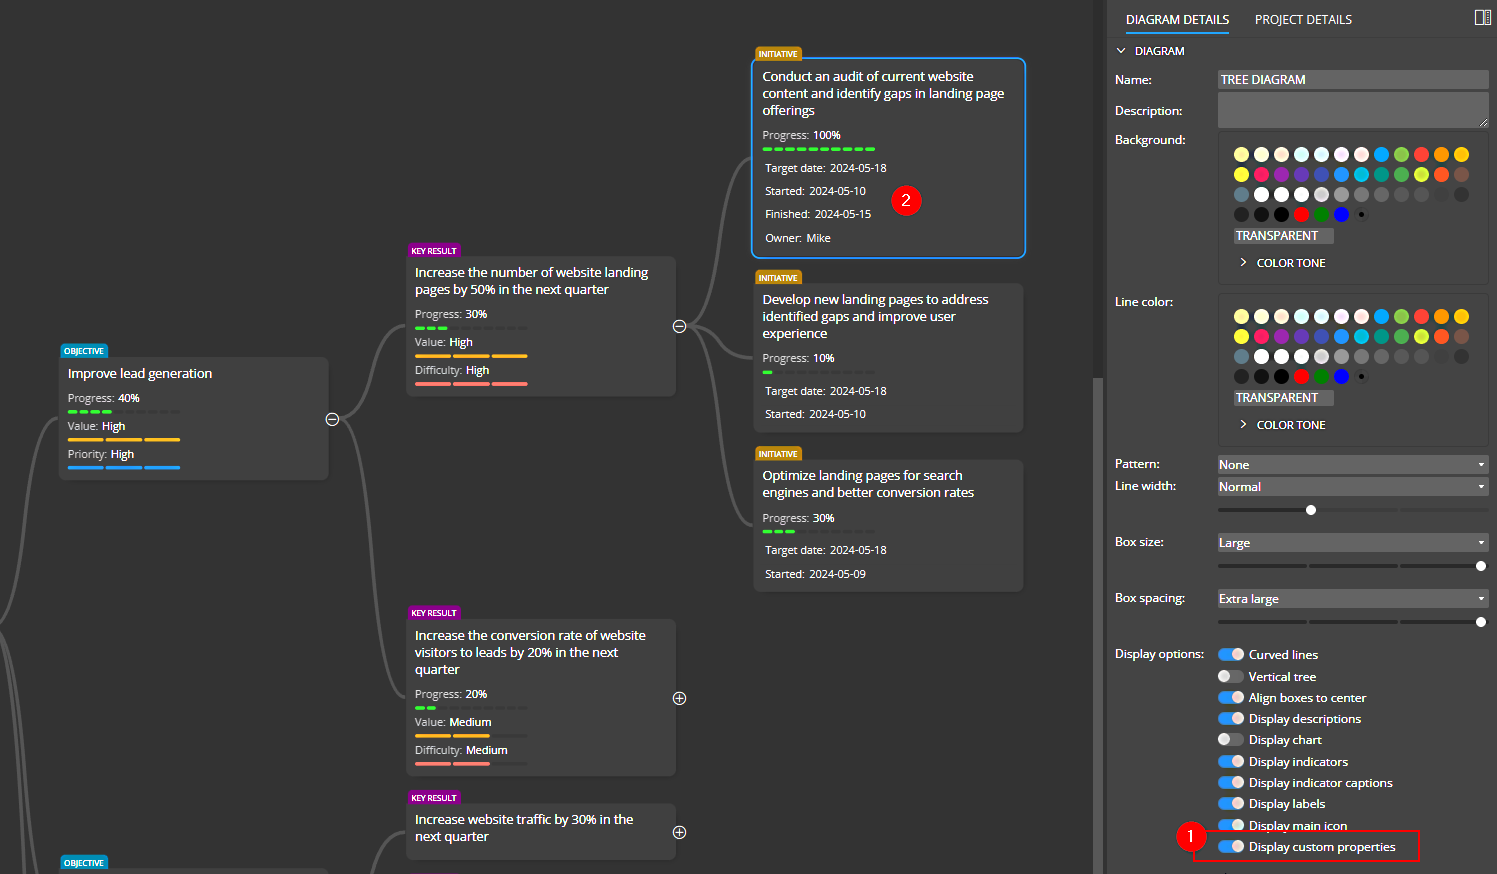
Example of custom properties and displaying values in a diagram:
Benefits
You can extend your diagram with additional information using custom properties. For example, you can define custom text or numeric values, additional indicators using range components, dates, links to other files, etc.
Easier communication with other team members. For each custom property you can define whether it should be displayed on the diagram. All custom properties can be shown or hidden on the diagram with a single switch.
In combination with templates, you can generate custom output.
Comfortable UI for working with customizations and templates. All products in our portfolio include a custom UI for defining customizations and custom properties.
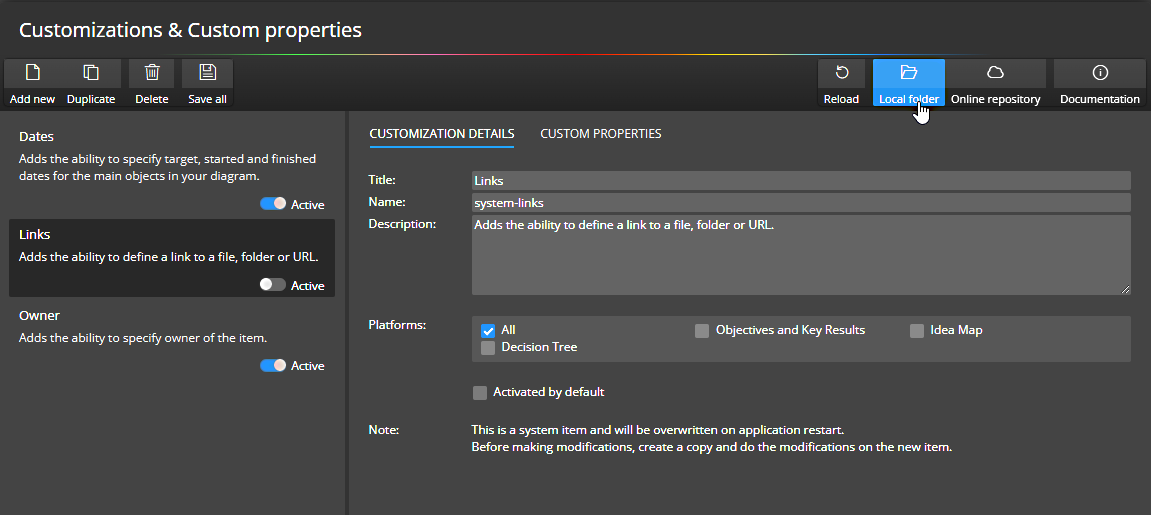
Customizations
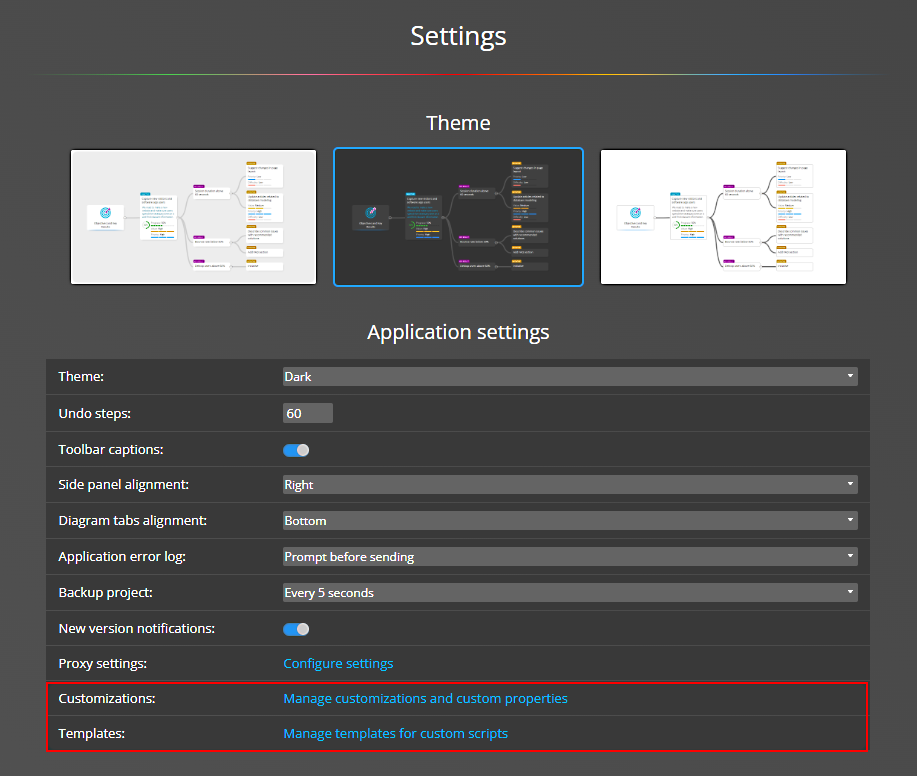
The customizations are available from the Settings page.
Click the Manage customizations and custom properties link to open a form with a list of available customizations. Here you will see the available customizations that you can easily activate and manage.
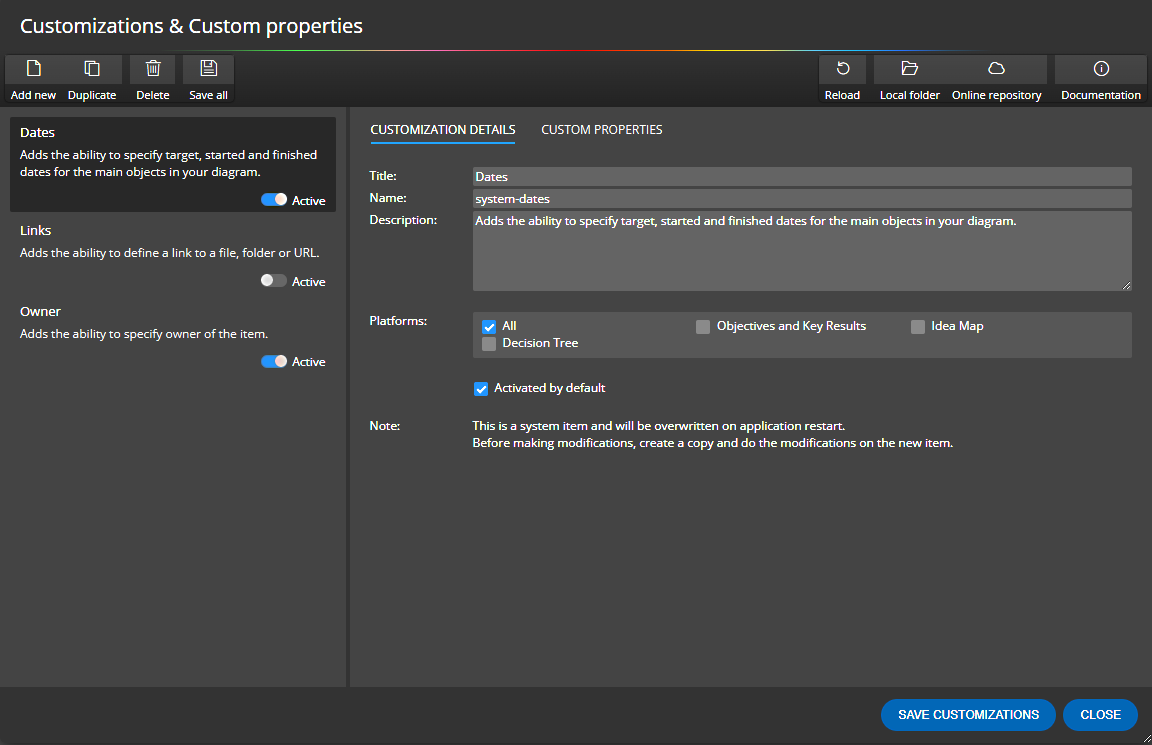
Each customization has its own definition. It contains basic settings, such as which target platform it is available for, etc. Custom properties are also part of the customization. Everything is stored in one single file that you can easily share with other users.
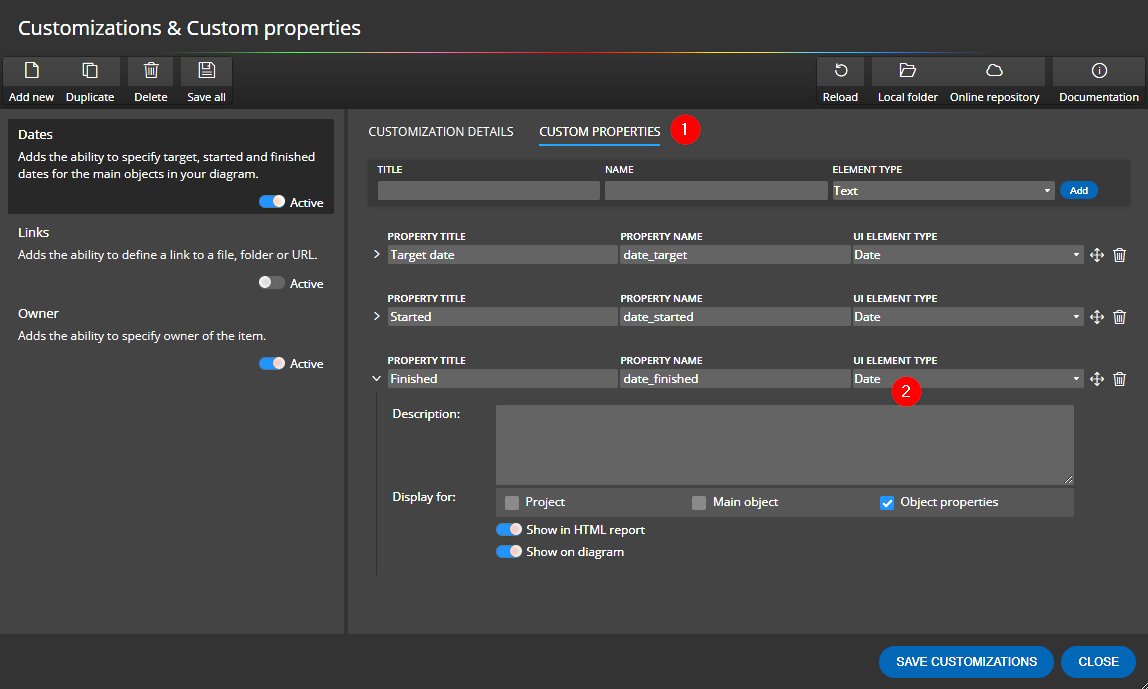
Custom properties
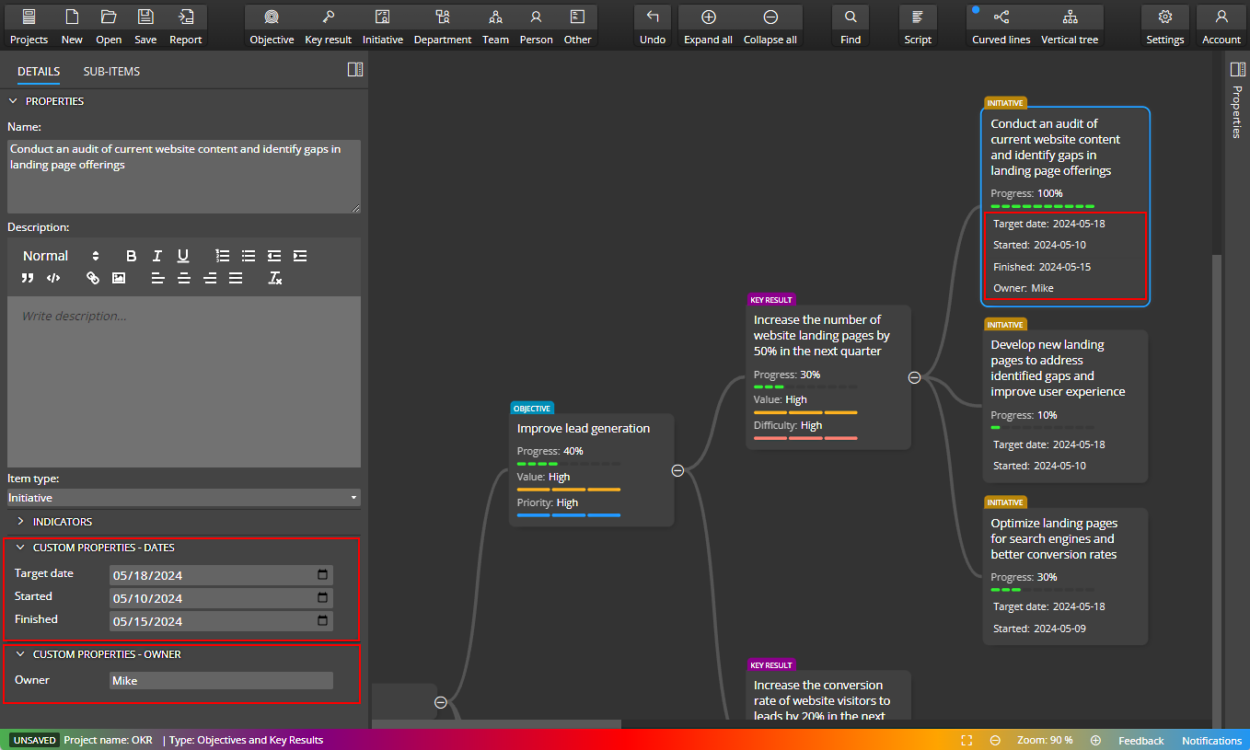
Custom properties can be defined visually on tab Custom properties (1). You can specify detailed settings, like UI element type (2) and choose for which object types the custom property should be available, whether it should be displayed on the diagram etc.. Options can be defined for certain types of UI elements. Such as for Range, Select, etc.
UI elements and side panel
When you define a custom property, you can choose the UI element that suits you best, whether it’s a simple text field, textarea, select or range, visual editor or something else. The selected UI element will then be used in the side panel, where you specify a value that will be stored in the custom property.
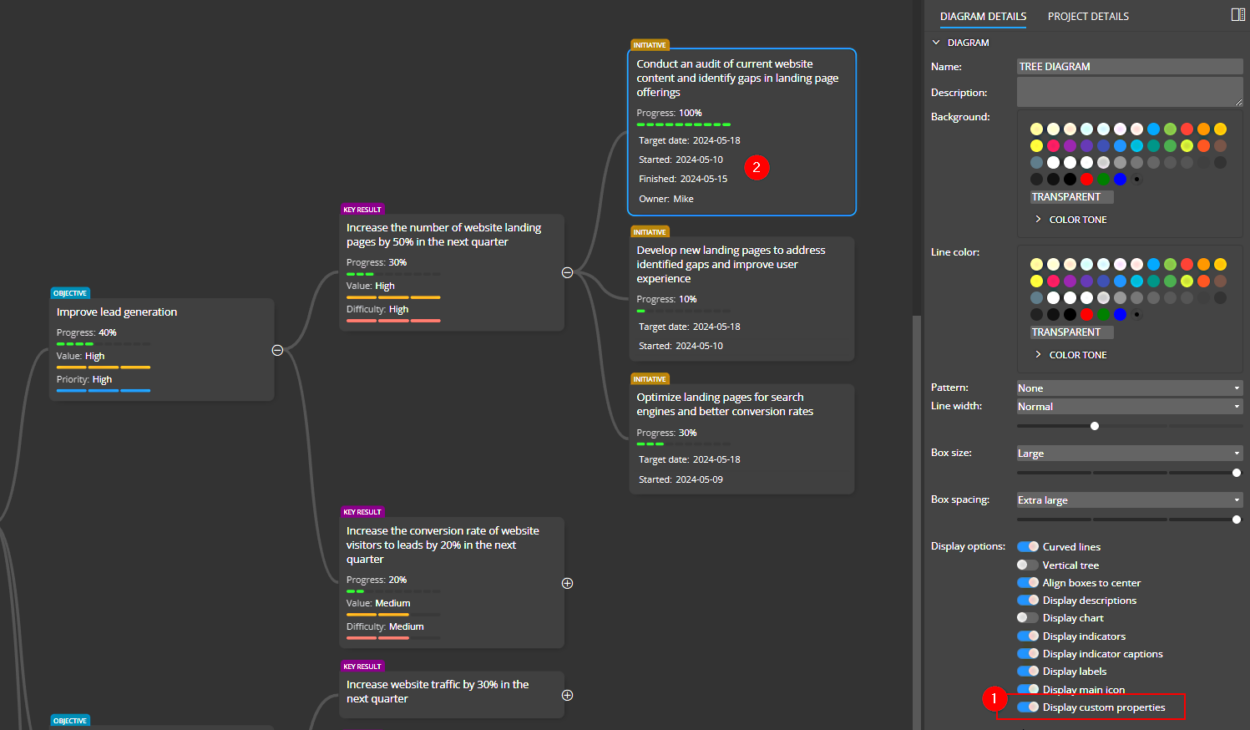
How to display custom properties on a diagram?
All custom properties that have the Show on diagram option enabled can be displayed on the diagram by turning on the Display custom properties switch in diagram details.
Custom scripts and templates
One very powerful feature is the ability to use custom properties when generating custom output.
Available customizations and how to activate them
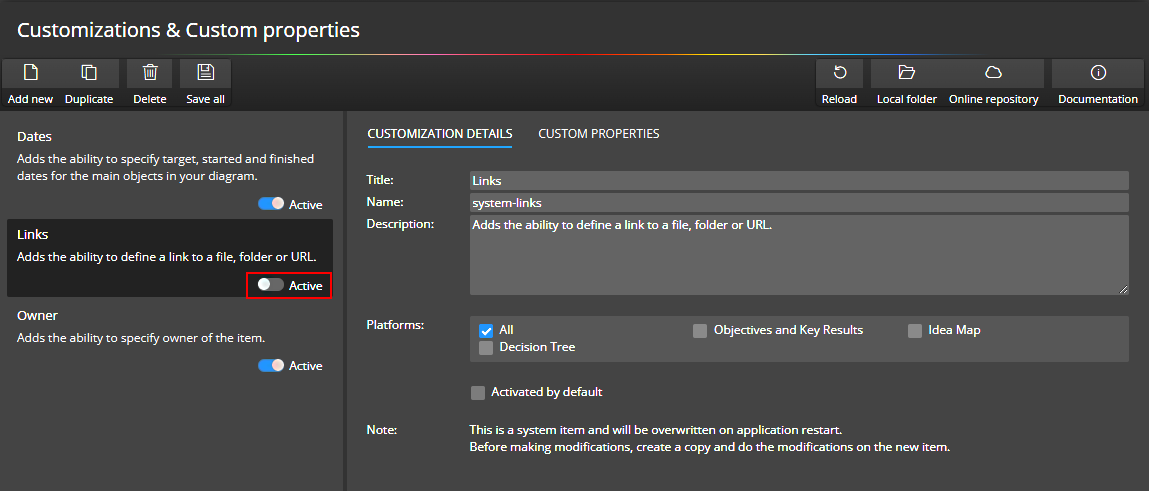
Together with the application several customizations are distributed. They are deactivated by default, as each customization adds its own properties and we want to leave it up to you whether you find certain extensions useful. If you want to try a customization, just activate the selected customization by turning on the Active switch.
As you could see above, for some customizations templates for generating custom code are also available. We recommend to look in the Templates section (accessible from the Settings page) and activate the appropriate templates.
Note: Information about active customizations and active templates is not stored in the customization or template definitions.
Making modifications and creating new customizations
System customizations (those whose name contains “system-“) will always be overwritten on application startup. So if you want to edit a customization, click the Duplicate button and work with the copy. You can also create a completely new customization and start adding your own properties.
Importing customizations (and templates)
In our modeling tools you can define customizations and templates and combine these elements. You can also write multiple templates that will use the same customizations etc. And some of them you may want to share with other users and some you may not. That’s why we’ve decided not to create packages that contain both customizations and templates for now, and we’ve kept these things separate. So if you want to load customizations and also templates from a friend/colleague for example, open the Customization & Custom properties form and click on the Local folder button on the toolbar. In the customizations folder, place the *.cst.json files, which are the customizations and custom properties files.
To import the templates, open the Templates for custom scripts form and follow a similar procedure. Click on Local folder and then place the *.json and *.hbs files in the templates folder.
Repository for customizations
A GitHub repository for templates is at your disposal. In case you need advice or collaboration on template creation, feel free to contact us.
Ideamerit Designer allows you to use templates to generate your own scripts, HTML code, CSV files etc.
Predefined templates
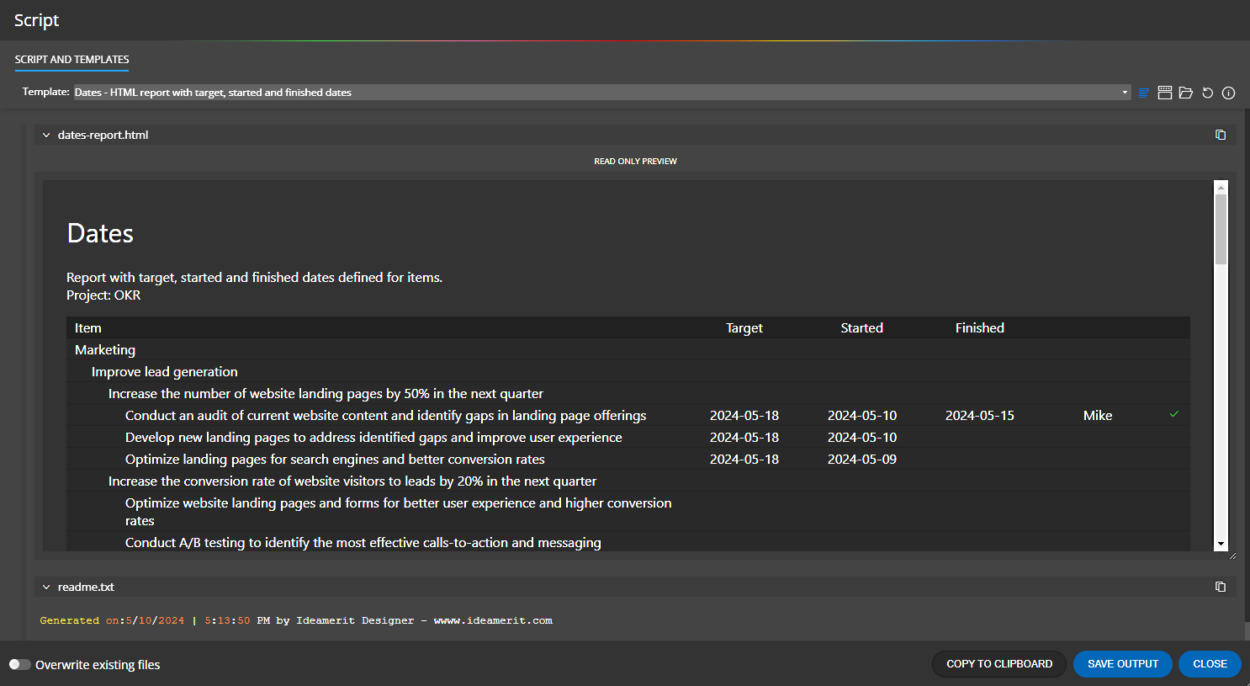
In the application you can find the Script and Templates tab on the Script modal form with several predefined templates. You can select any item from the dropdown menu and view the generated script.
Custom properties and templates
Since versions 2.0, you can also define customizations with custom properties that can be used in your templates. In addition, there is a form where you can easily edit existing templates settings and activate or deactivate individual templates.
Templates and customizations are available from the Settings page.
Making modifications and creating new templates
If you want to modify this generated script or generate your own output, whether it is Python code, JavaScript code, etc., just create a copy of one of the predefined templates and start editing this copy or create a completely new template.
How does it work?
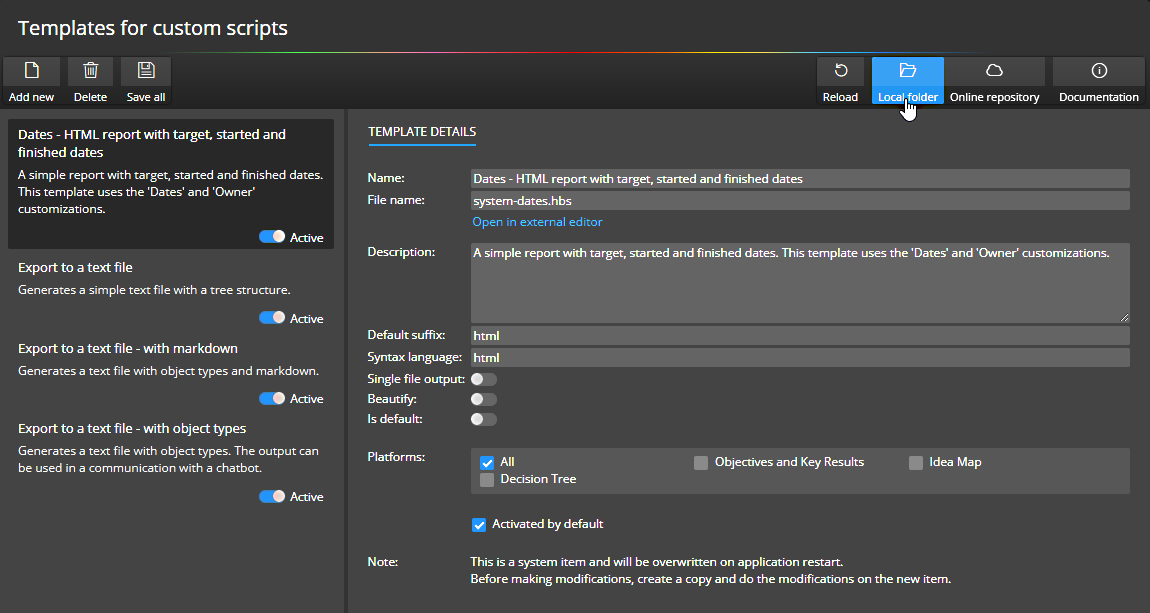
All templates are stored in the templates folder, which can be opened directly from the user interface.
Each template is composed of two files:
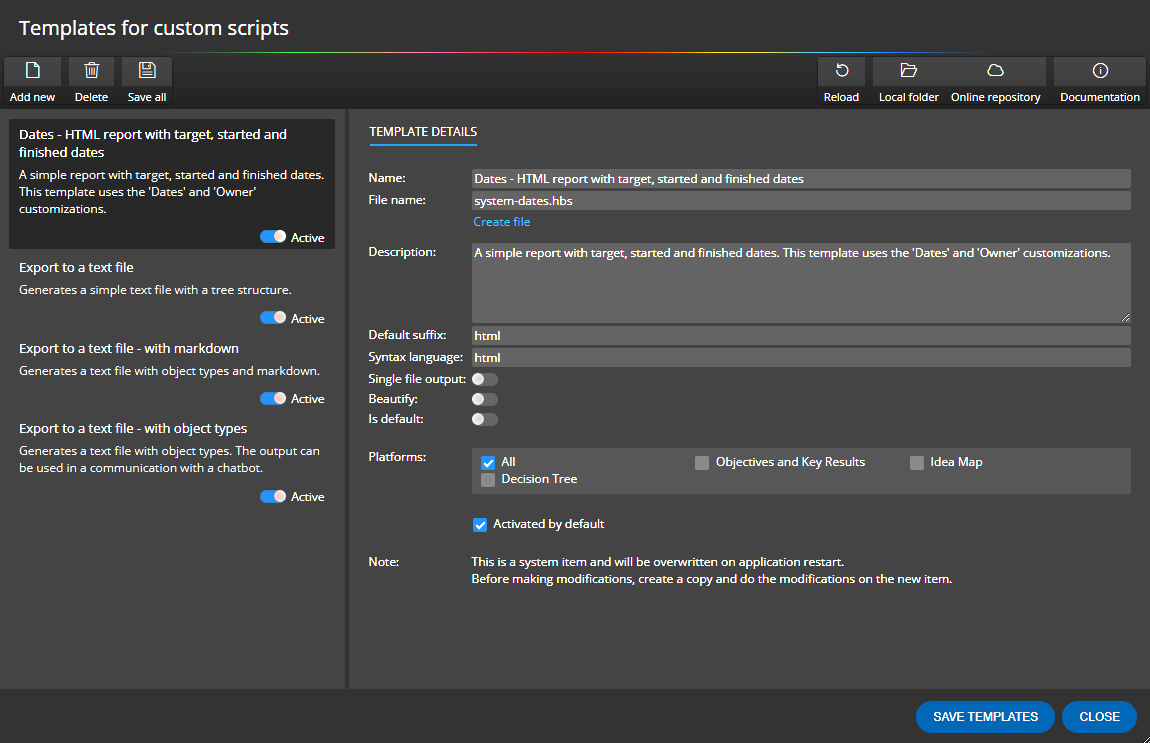
One is a *.json document that contains a description of the template and settings for the resulting script. This one can be edited visually on the Templates for custom scripts form.
The second file is the *.hbs template, which contains code written in the Handlebars templating system.
my-custom-template.hbs (template written in Handlebars)
Note: System templates contain “system” in the name. If you see a template named system*.json and system*.hbs, make a copy of the files and do not edit the template files directly. Modification made to system templates will be automatically overwritten when the program starts.
Template definition file
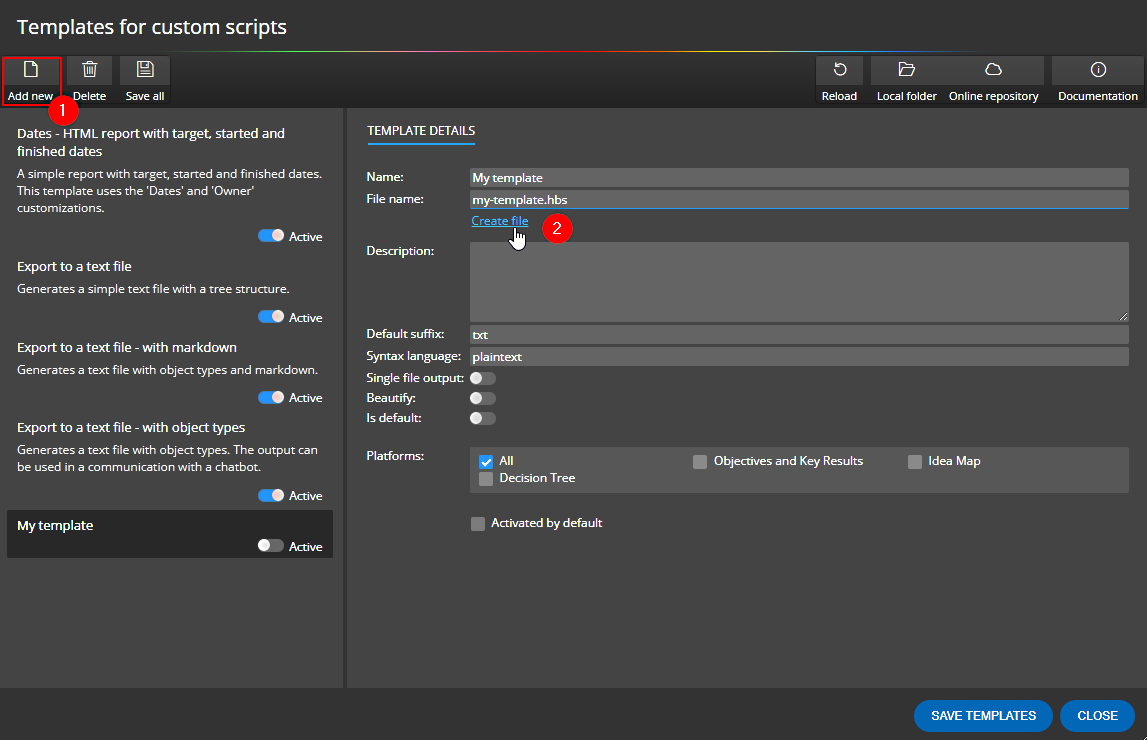
We recommend editing or creating these files in the UI, not manually. Just click the Add new (1) button on the toolbar to create a new definition file. Then specify name and file name for your template and click Create file (2) to save a new *.hbs file. Then edit the template in an external editor like VS Code or similar.
Template written in Handlebars
Write your template in Handlebars – https://handlebarsjs.com It is a popular templating system that is easy to understand and easy to create templates in. You can define template processing conditions for a selected object or for the whole project.
Another important advantage is the possibility to use so-called inline partial templates. Which is a part of a template that can be used multiple times within the main template. In addition, partial templates do not need to be defined in other separate files and so the body of your template can be written within a single *.hbs file.
Example of the system-plain.hbs file:
Inline partial templates
In the screenshot above, you can see on line 4 the call/reference to the itemDetail template which is the inline partial template defined from line 13. You can easily split the template in this way.
Available helpers
In our products we have our own handlebars helpers. These are used for filtering, sorting, comparing, quoting etc. and also to define when a new file should be created.
To create a new file with the default extension (the one specified in the *.json file), use the following:
To create a new file with a non-default extension, use the following:
{{~#newFileWithSuffix "readme" "txt"~}}
Generated on: {{~timestamp}} by Ideamerit Designer - wwww.ideamerit.com
{{~/newFileWithSuffix~}}
For more details please feel free to contact us.
Repository for custom templates
A GitHub repository for templates is at your disposal. You can contribute your own templates to this repository. In case you need advice or collaboration on template creation, feel free to contact us.
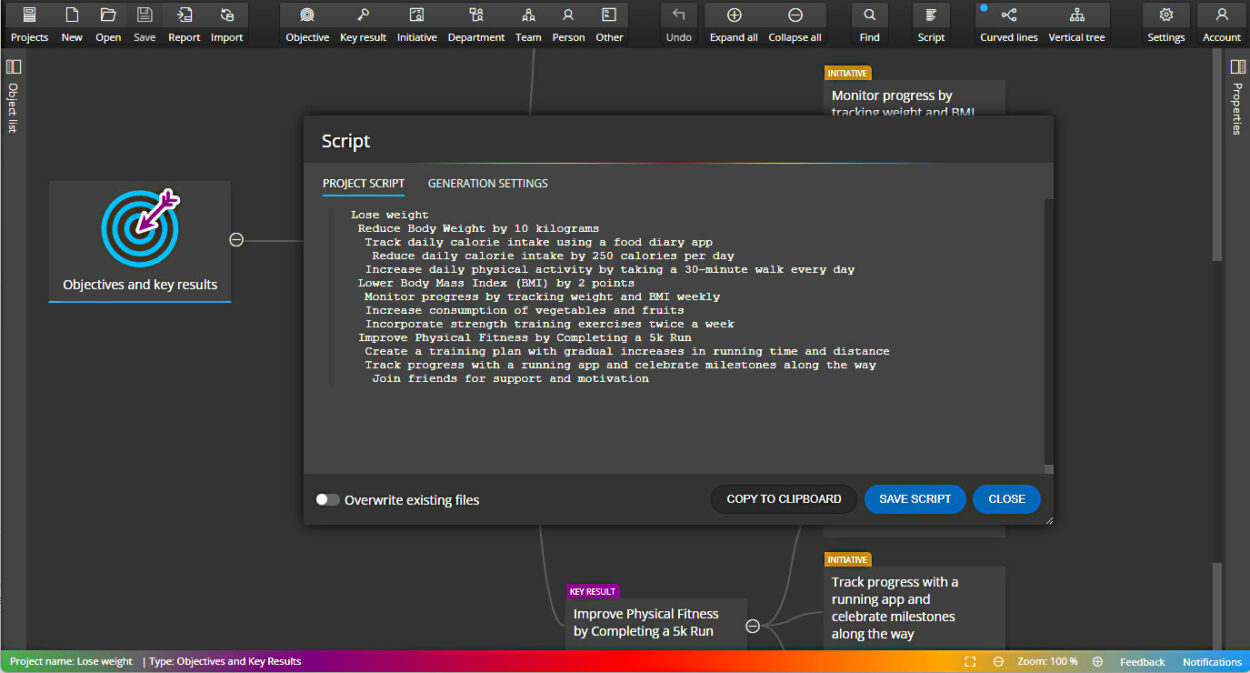
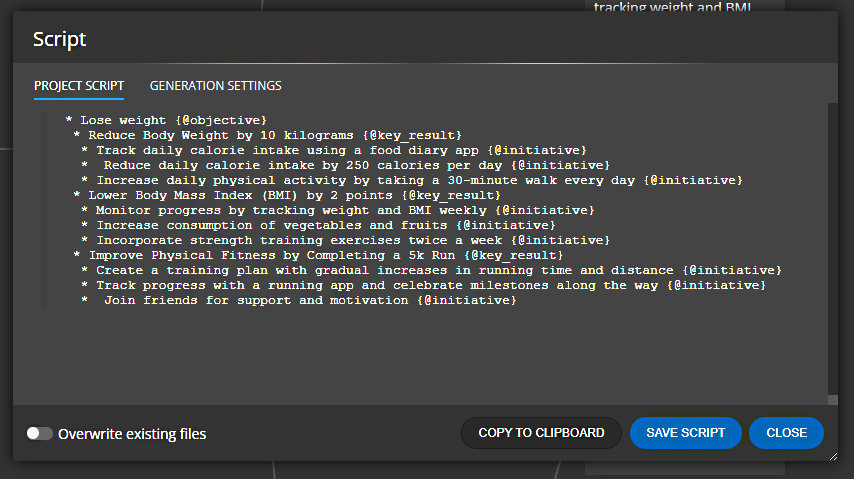
In the Ideamerit Designer you can use the option to generate output not only as a PDF file or HTML report, but also as a simple text script.
To generate the simplified output, click the Script button on the main toolbar. A new form opens. Review the list of items, copy the output to the clipboard or save the script to a file.
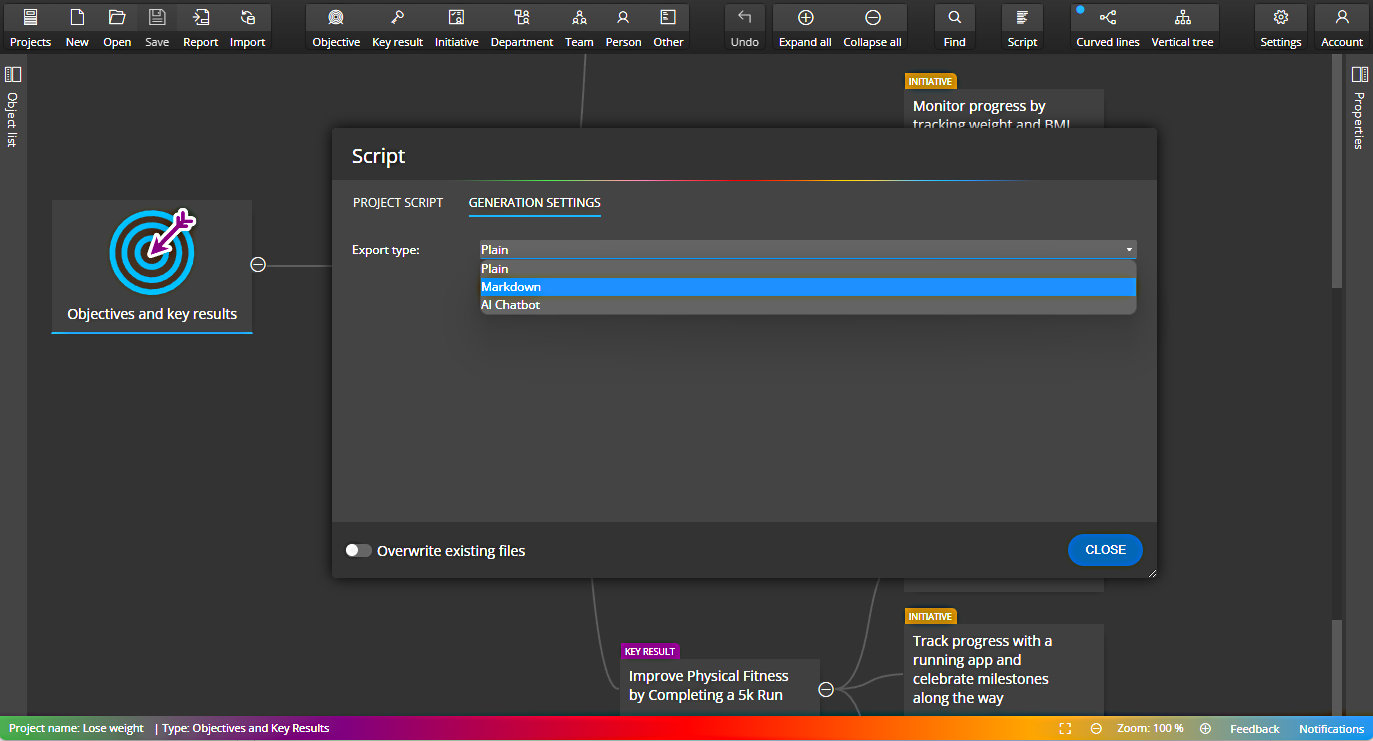
On the Generation Settings tab, you can select the type of export. Pain text, Markdown or AI chatbot. Note: All formats will be correctly recognized when importing all items back into the project or diagram.
Change the export type and navigate back to the Project Script tab to see the formatted output.
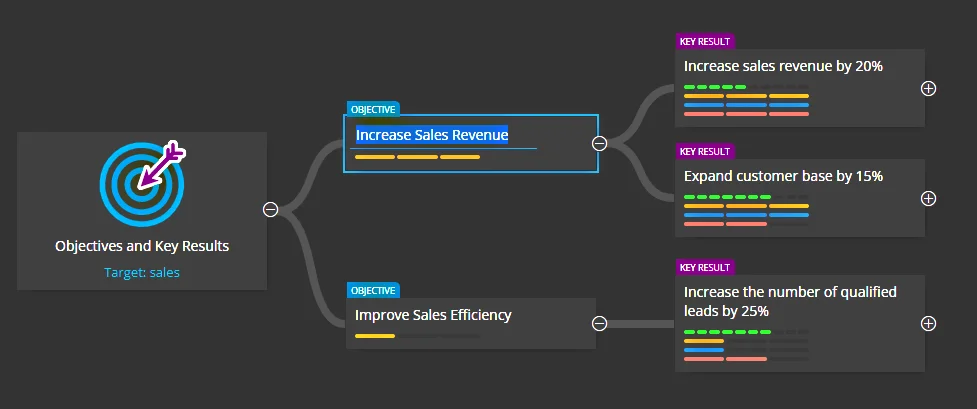
Of course, a chatbot can also help you define objectives and key results. Just write a query and specify the format of the expected result and then you can easily create a diagram for your OKRs. It’s that simple.
Let’s see how to import OKRs into the diagram.
Prepare a prompt / query
Ideamerit Designer supports several different types of formats that can be used for import. One of the recommended ones for OKRs is as follows:
* text {@objective}
 * text {@key_result}
  * text {@initiative}
In order for the chatbot to generate a list of items in this form, you can use, for example, this query:
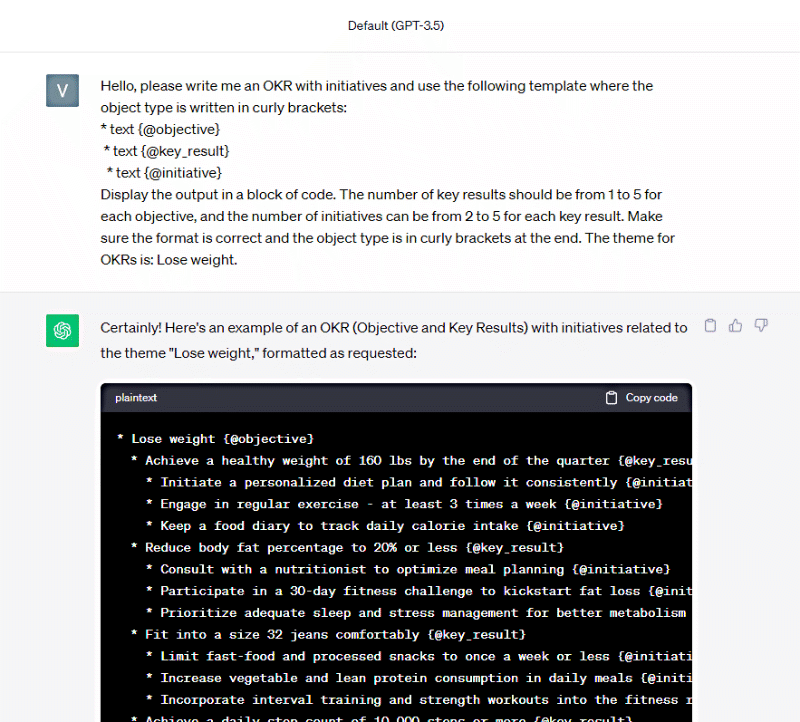
Hello, please write me an OKR with initiatives and use the following template where the object type is written in curly brackets:
* text {@objective}
 * text {@key_result}
  * text {@initiative}
Display the output in a block of code. The number of key results should be from 1 to 5 for each objective, and the number of initiatives can be from 2 to 5 for each key result. Make sure the format is correct and the object type is in curly brackets at the end. The theme for OKRs is: Lose weight.
Use the prompt / query
Run this query in your favorite chatbot. (On the following screenshot you can see suggestions generated by Chat GPT 3.5). As you can see, this way you can achieve both a very high quality and fast specification. Copy the result to your clipboard.
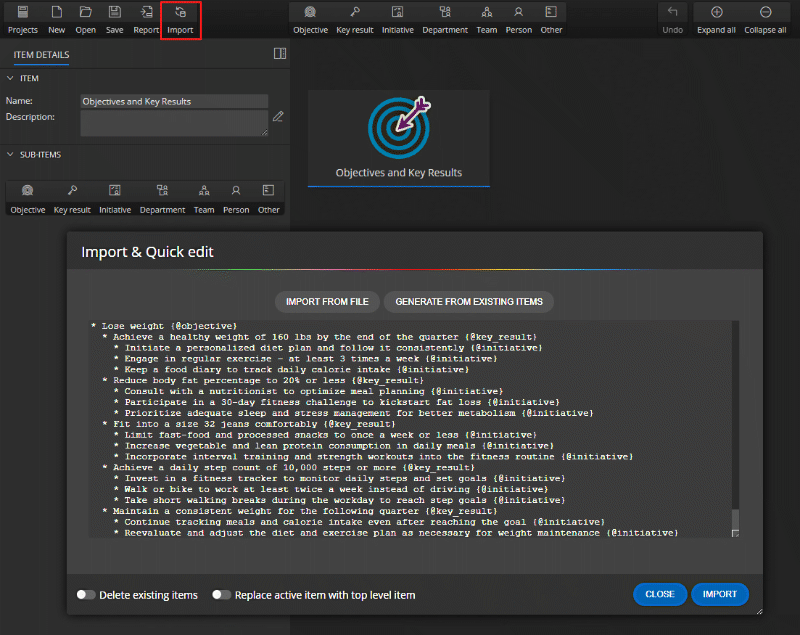
Import the OKRs to Ideamerit Designer
On the main toolbar click the Import button. New form opens. Paste the text to the text area and press Import.
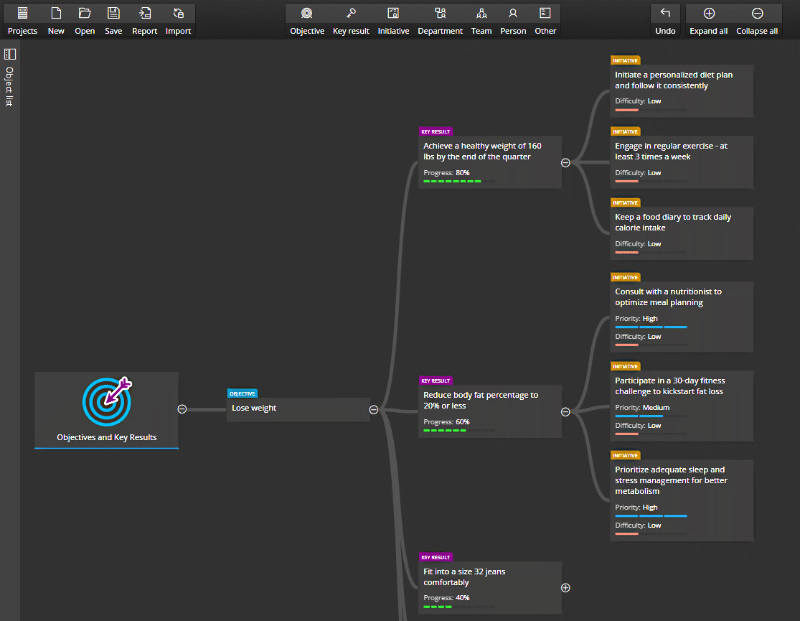
Ideamerit Designer will convert the text into a diagram. In the next step you can then set the priority, difficulty and also start tracking the progress.
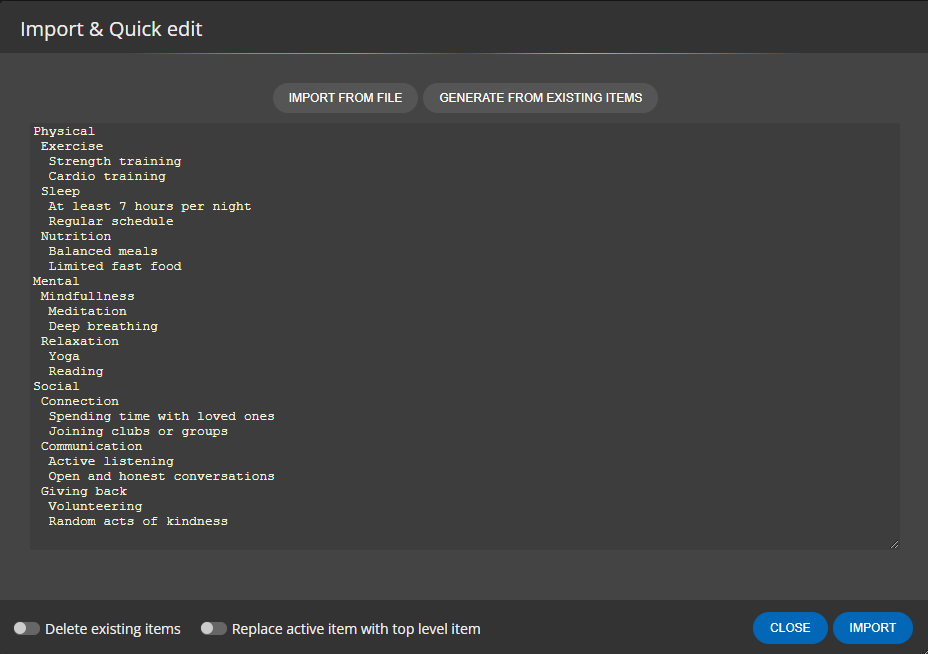
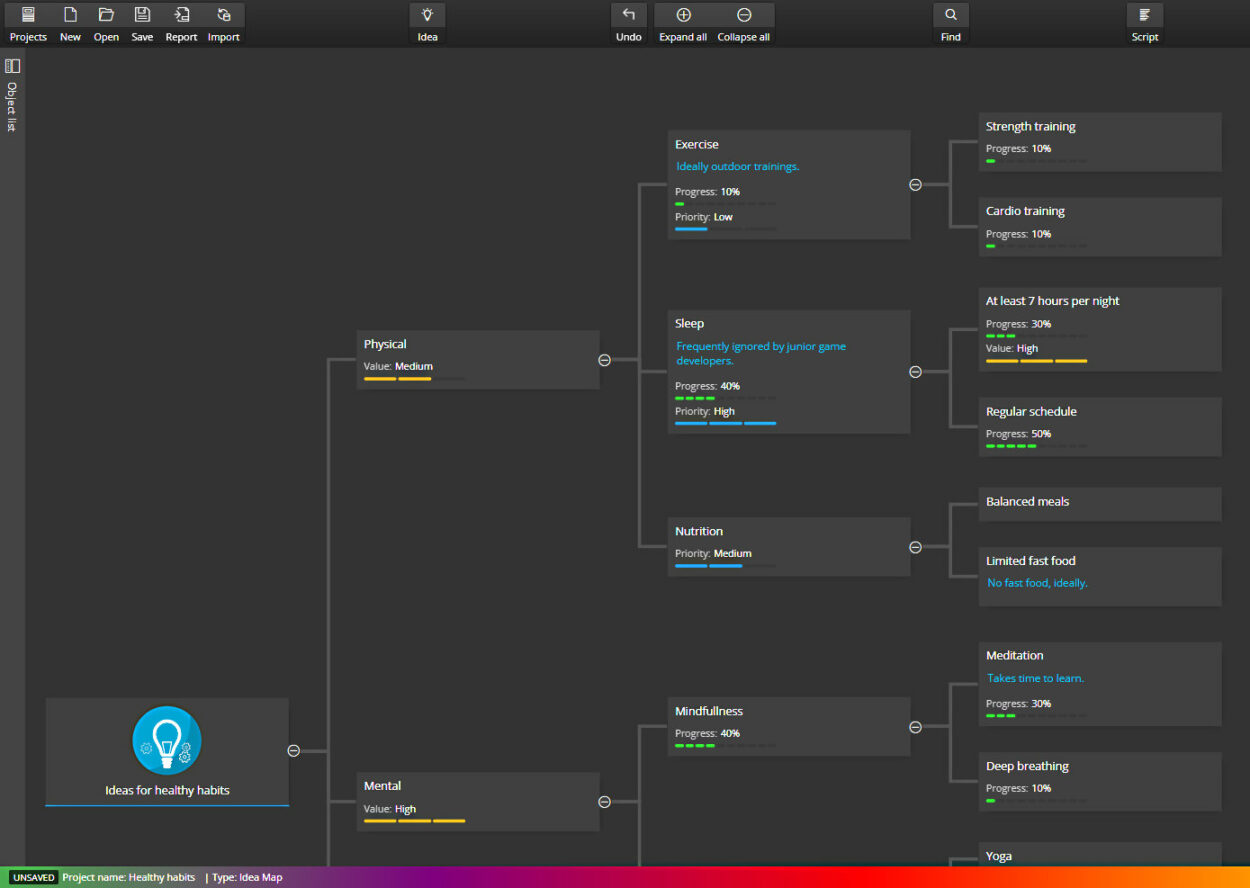
In you mindmap or ideamap diagrams, you can define your item and goals individually, or start by importing a simple list that adds new items under the selected item.
If there is indentation in the list, the indented items will be placed lower in the tree diagram. Learn how to easily import the ideas.
Import simple text
Open your project and click on Import on the main toolbar.
Enter text and click Import
Mindmap / Ideamap diagram with the imported items:
Keyboard shortcuts allow you to increase your productivity when designing diagrams for Objectives and Key Results, as well as Mindmap or Decision Tree diagrams.
Navigation
Arrow keys
Use the Arrow Keys to move around the items in the diagram. The function varies depending on whether you have the diagram displayed horizontally or vertically.
CTRL+Arrow keys
Used to expand or collapse actions in the diagram. When pressed, all sub-items will be expanded or collapsed.
SHIFT+Arrow keys
Used to expand or collapse the nearest sub-items. Everything else remains in the original expand/collapse state.
Editing elements
Enter – edit mode in the diagram Alt+Enter – navigate to the left sidebar and back to the element in the diagram Esc – exit edit mode
To quickly edit elements directly in the diagram, press the Enter key. You can then change the main text and confirm your edits either by pressing Enter again or by pressing Esc.
To move to the left sidebar, you can press Alt+Enter. Pressing Alt+Enter again moves you back to the active entry in the diagram.
Adding new items
There are keyboard shortcuts available for each diagram type.
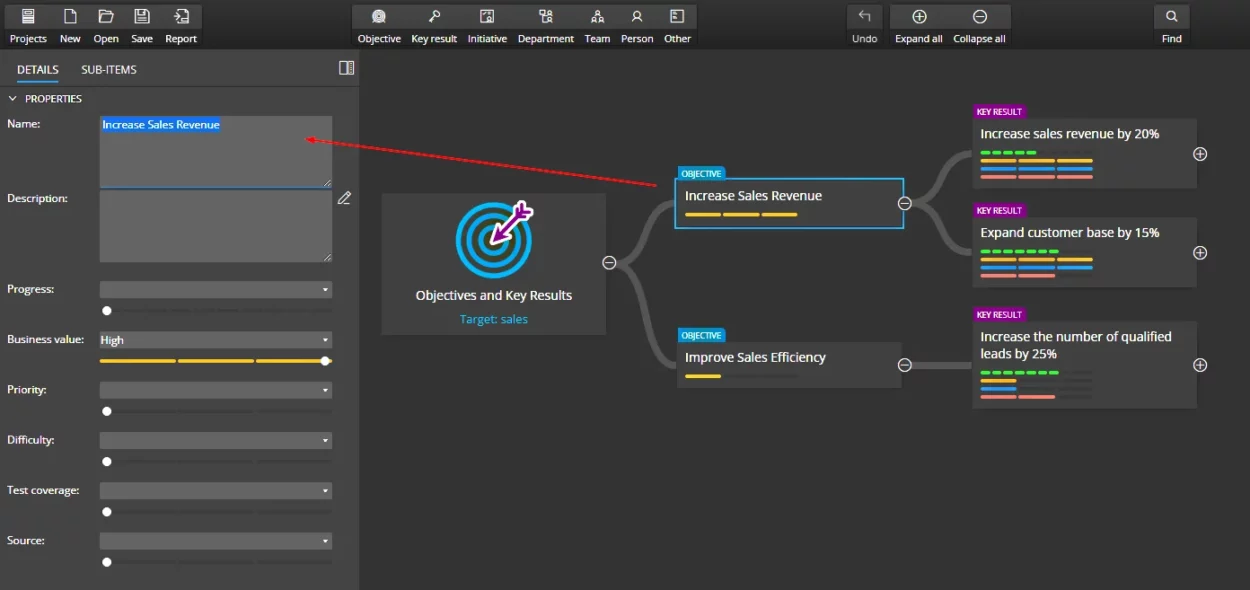
Objectives and Key Results
O – new Objective K – new Key Results I – new Initiative D – new Department T – new Team P – new Person H – new Other
Ideamap
I – new Idea
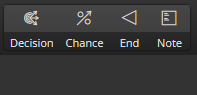
Decision Tree
D – new Decision C – new Chance E – new End N – new Note
Copy and Paste
CTRL+C – Copy CTRL+V – Paste CTRL+SHIFT+V – Paste as sibling CTRL+X – Cut (Copies the item to the clipboard and immediately removes the item)
Classic keyboard shortcuts
CTRL+S – save project CTRL+O – open project CTRL+Z – UNDO CTRL+SHIFT-Z – REDO
Ideamerit Designer offers the ability to generate HTML reports and export diagrams to PDF.
How to export diagrams to PDF?
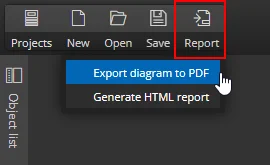
The procedure is simple. Open your project and click on Report – Export diagram to PDF on the main toolbar. Enter the path where the PDF file will be saved.
What is the quality of the resulting PDF?
As everything is rendered in vectors, all objects in the PDF file will be of high quality, enlarging or shrinking will not have a negative effect on the resulting quality and therefore the diagrams can be printed very easily.
HTML and SVG format – high quality format of the graphics and lines.
Easy-to-view – no server required, reports work perfectly in the local environment. Click on the index.html file to view the report. It’s that simple.
Easy-to-share – zip the report and send it to a colleague, or upload the report to your server and then embed the files on your favorite site using the IFRAME tag.
How to create a data model report
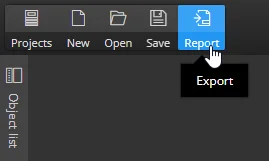
To create a new report, open your project and click on the Report button on the main toolbar
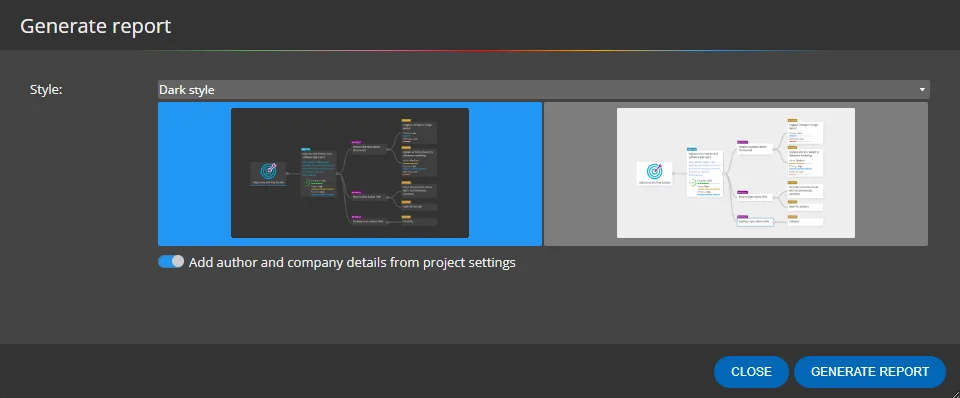
Select the report style
Select the target folder and generate the report.
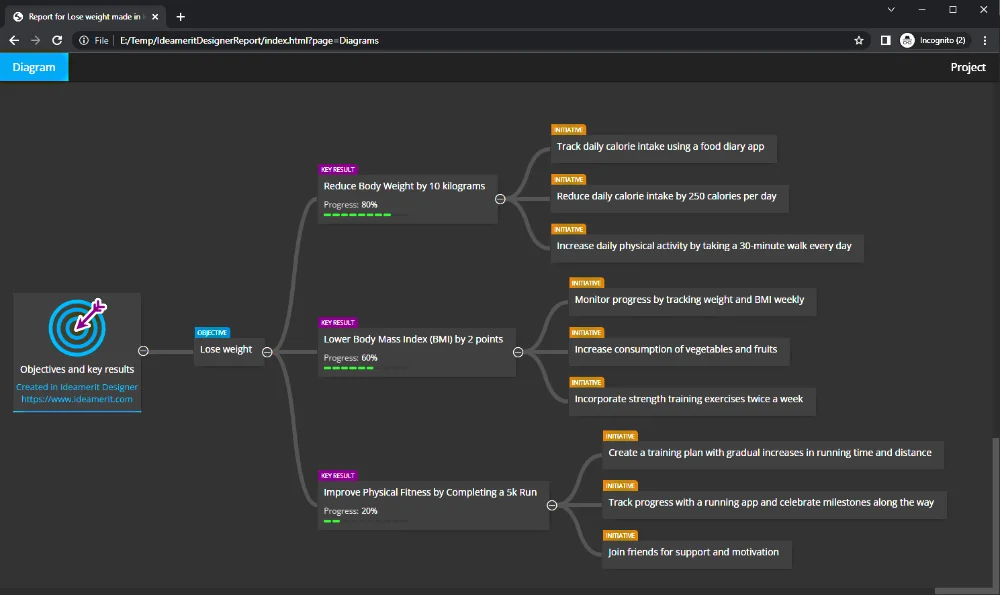
Example of generated report:
How to add the generated report to other sites?
Use the IFRAME tag. This might be the easiest way how to add the report to e.g. Atlassian Confluence.
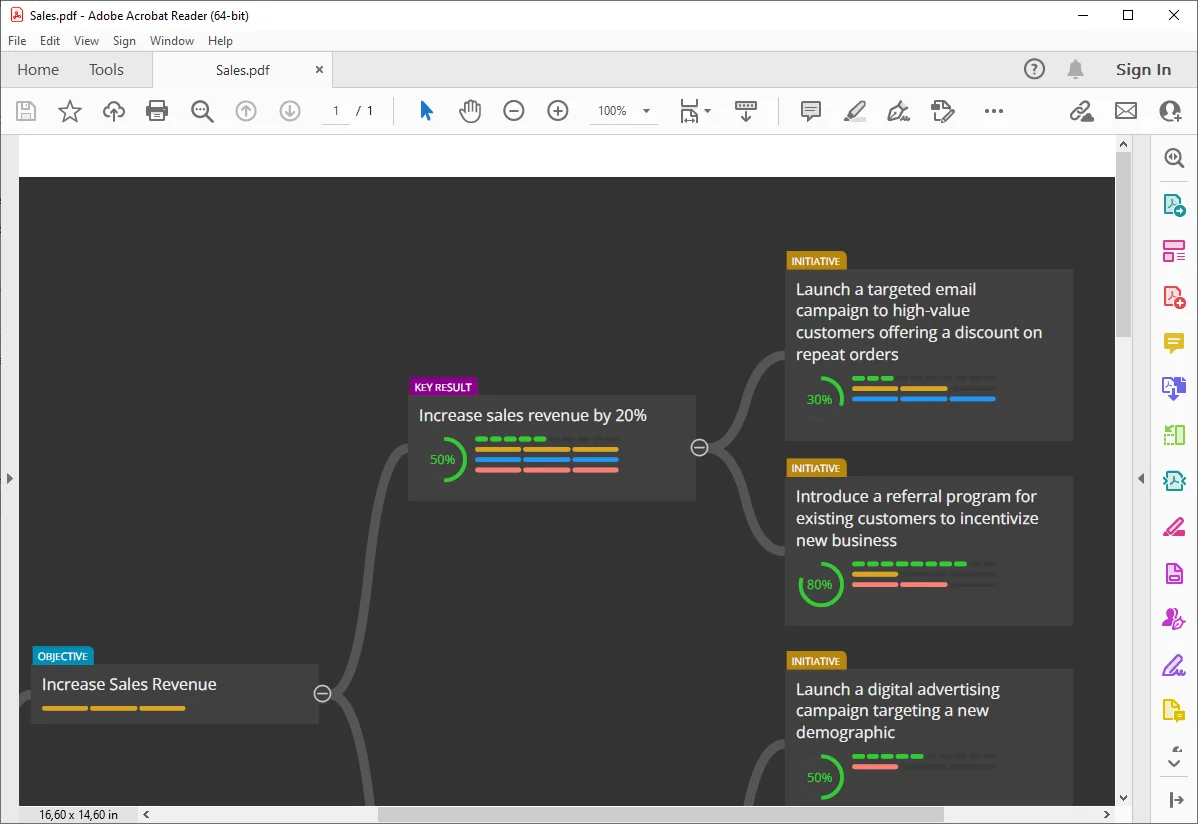
Objectives and Key Results (OKRs) is a popular goal-setting framework used by businesses and organizations to improve performance and achieve success. OKRs help teams align their efforts towards common objectives, measure progress, and drive results. However, the process of defining, tracking, and communicating OKRs can be complex and time-consuming. That’s where software applications come in – they can help simplify the process and make it more efficient. In this article, we’ll explore the benefits of using a software application like Ideamerit Designer for visual definition of OKRs.
What is Ideamerit Designer?
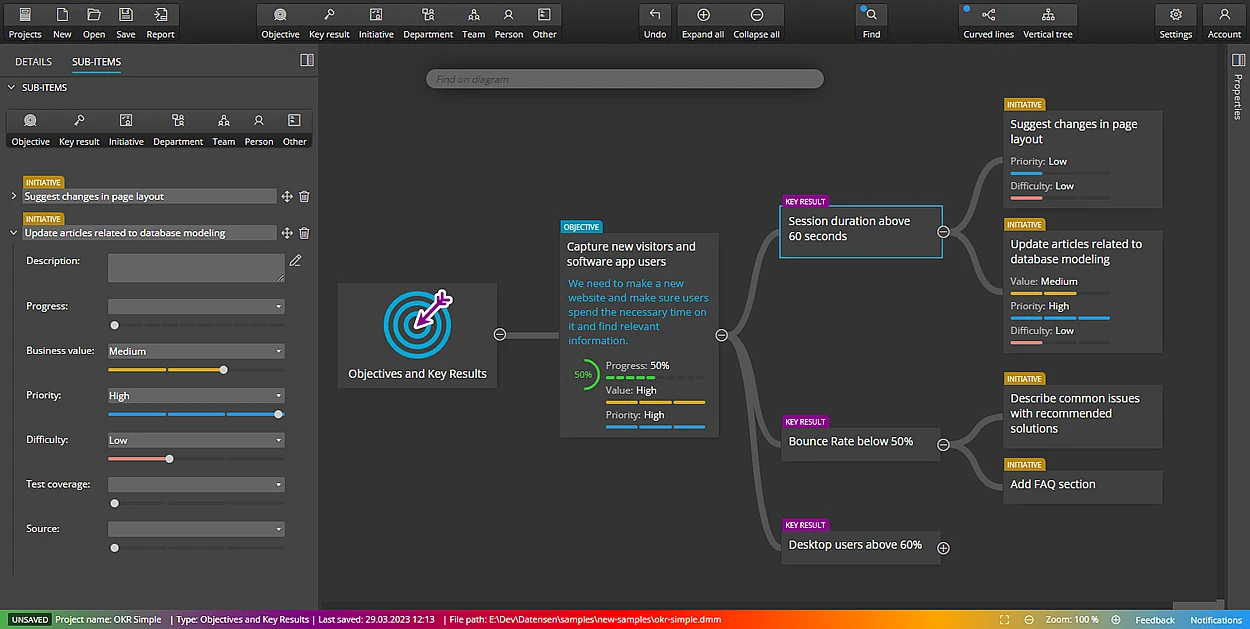
Ideamerit Designer is a software application for visual definition of OKRs that helps businesses and organizations set and track their OKRs in a visual and intuitive way. This application provides a visual interface that allows users to create and manage OKRs, assign responsibilities, and track progress towards achieving the objectives. It also provides reporting features that allow teams to evaluate their performance and adjust their strategies accordingly.
Benefits of using Ideamerit Designer for visual definition of OKRs
1. Improved collaboration and alignment
Ideamerit Designer can help improve collaboration and alignment among team members. By providing visualizations for defining and tracking OKRs, everyone can have visibility into the objectives and key results, as well as the progress being made towards achieving them. This can help foster a sense of shared ownership and accountability, and ensure that everyone is working towards the same goals.
2. Increased efficiency and productivity
Using Ideamerit Designer can also help increase efficiency and productivity. Teams can save time and focus on the work that matters most. Additionally, the visual interface can help teams quickly identify areas that need attention, allowing them to adjust their strategies and stay on track towards achieving their objectives.
3. Enhanced visibility and transparency
Ideamerit Designer can provide enhanced visibility and transparency into the progress being made towards achieving objectives. This can help improve communication and ensure that everyone is aware of the status of each objective.
4. Better decision-making
Finally, by providing reporting features, Ideamerit Designer can also help teams make better decisions. Teams can gain insights into what is working and what isn’t, allowing them to adjust their strategies and make more informed decisions.
Conclusion
Ideamerit Designer can provide numerous benefits to businesses and organizations that are looking to implement OKRs – objectives and key results in their workflow. By improving collaboration and alignment, increasing efficiency and productivity, enhancing visibility and transparency, enabling better decision-making, this application can help teams achieve their objectives and drive success. If you’re considering implementing OKRs in your organization, Ideamerit Designer may be the key to making the process more efficient and effective.